Data-Driven Testing
Run the same request(s) over and over again, each time with a different set of values pulled from a CSV or JSON file. Perfect for testing many combinations of inputs - different users, product IDs, search terms, form submissions, etc. - without manually editing your request between runs.
📂 Opening the Data-Driven Test panel
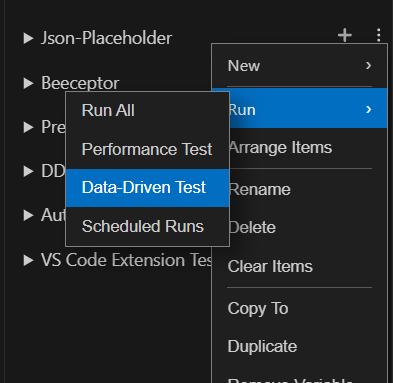
Right-click a Collection or Folder in your sidebar and choose Run → Data-Driven Test.
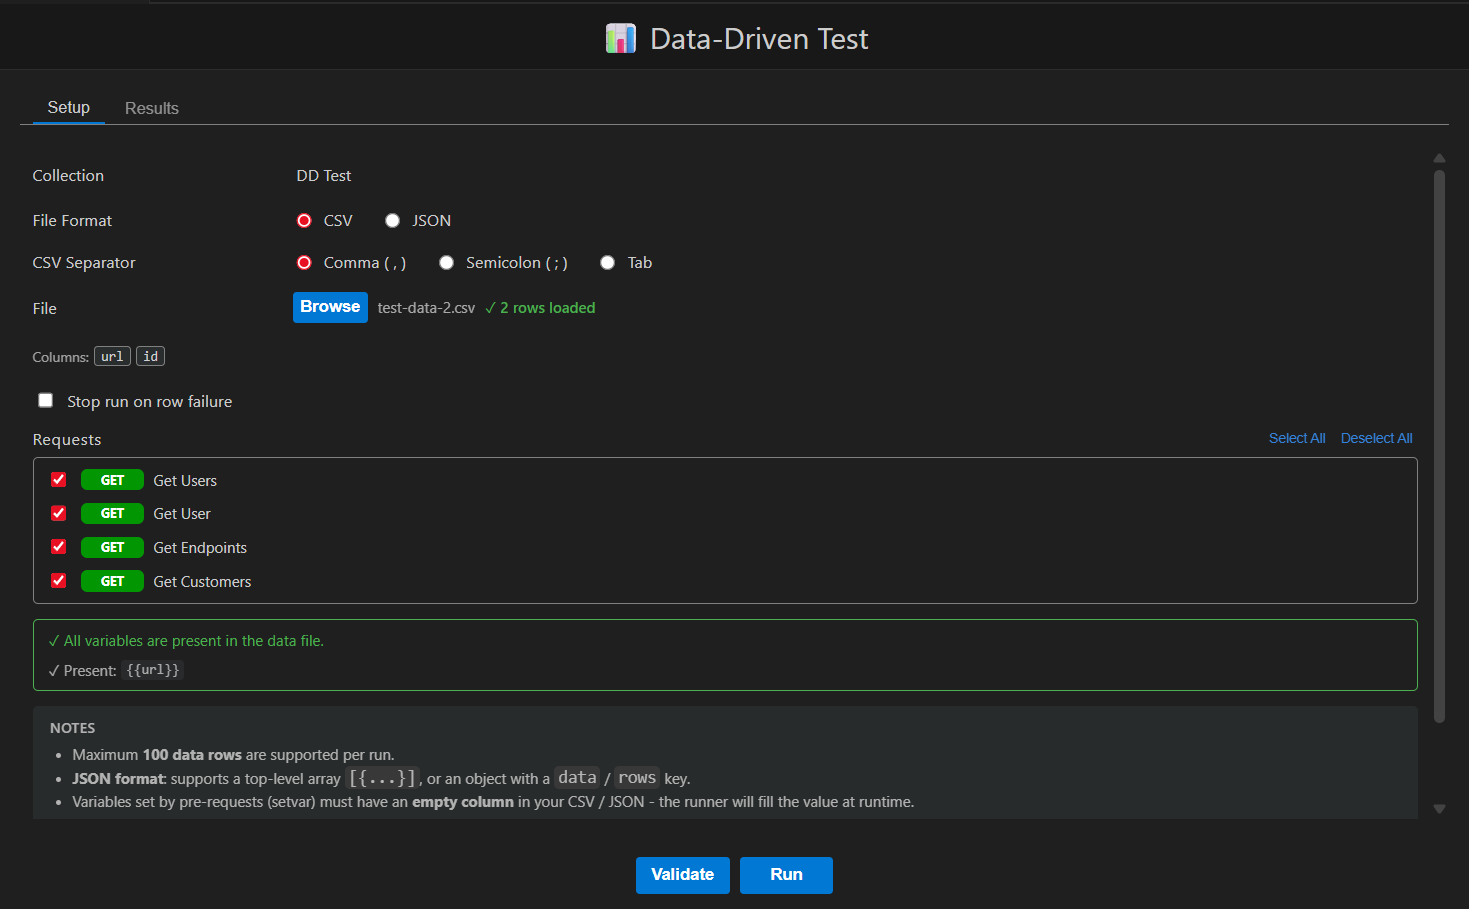
The panel opens with two tabs: Setup (prepare your data and pick your requests) and Results (live table of what happened, populated once you start).
📄 Preparing your data file
A data file is just a table of values - one row per test case, one column per variable. Each column header becomes a variable name you can use in your requests as {{columnName}}.
Example CSV:
username,password,expectedStatus
alice,pass123,200
bob,wrongpass,401
Every row in this file becomes one full run through your selected request(s), with {{username}} and {{password}} replaced by that row's values.
Supported file formats
| Format | What's supported |
|---|---|
| CSV | Comma, semicolon, or tab-separated. First row is treated as the column headers. Quoted values ("...") are supported if a value itself contains the separator. |
| JSON | Either a plain array of objects ([{...}, {...}]), or an object with a data or rows key containing the array. |
Use the Setup tab to browse for your file, then choose the matching File Format and, for CSV files, the correct Separator. Changing the format or separator automatically re-parses the file you've already loaded.
If the file can't be read - wrong format, empty file, no columns found - you'll see an error message right in the Setup tab instead of the row preview.
⚙️ Setup options
| Setting | Description |
|---|---|
| File Format | CSV or JSON - must match your data file. |
| Separator | Comma, semicolon, or tab (CSV only). |
| Stop on Row Failure | If turned on, the test stops as soon as one row fails instead of continuing through the rest. |
✅ Choosing your requests
Below the data settings you'll see every request in the collection/folder, each with a checkbox. Only checked requests are included in the test. Use Select All / Deselect All to quickly toggle everything.
If more than one request is selected, they run in order, one after another, for every row of your data file.
🔎 Validating before you run
Click Validate to double-check that your data file actually has everything your selected requests need:
- ✔️ Present - variables used in your requests (URL, headers, params, body, auth, etc.) that were found as columns in your data file.
- ❌ Missing - variables your requests need but that aren't in your data file. You'll want to add these columns before running, or your requests may fail or send empty values.
If a request depends on a pre-request that sets a variable (using a "Set Variable" step), that variable name still needs to exist as a column in your data file - just leave the values in that column empty. The runner will fill it in automatically when the pre-request runs.
Any variables already defined in your collection's variable set don't need to be in the data file - they're merged in automatically. If the same variable name exists in both places, the value from your data file wins.
▶️ Running a test
- Go to the Setup tab.
- Browse for your data file and pick the matching format/separator.
- Select which request(s) to include.
- (Optional) Click Validate to check for missing variables.
- Click Run. You're automatically switched to the Results tab.
- Watch results appear row by row as the test progresses.
- Click Cancel at any time to stop early - results gathered so far are kept and can still be exported.
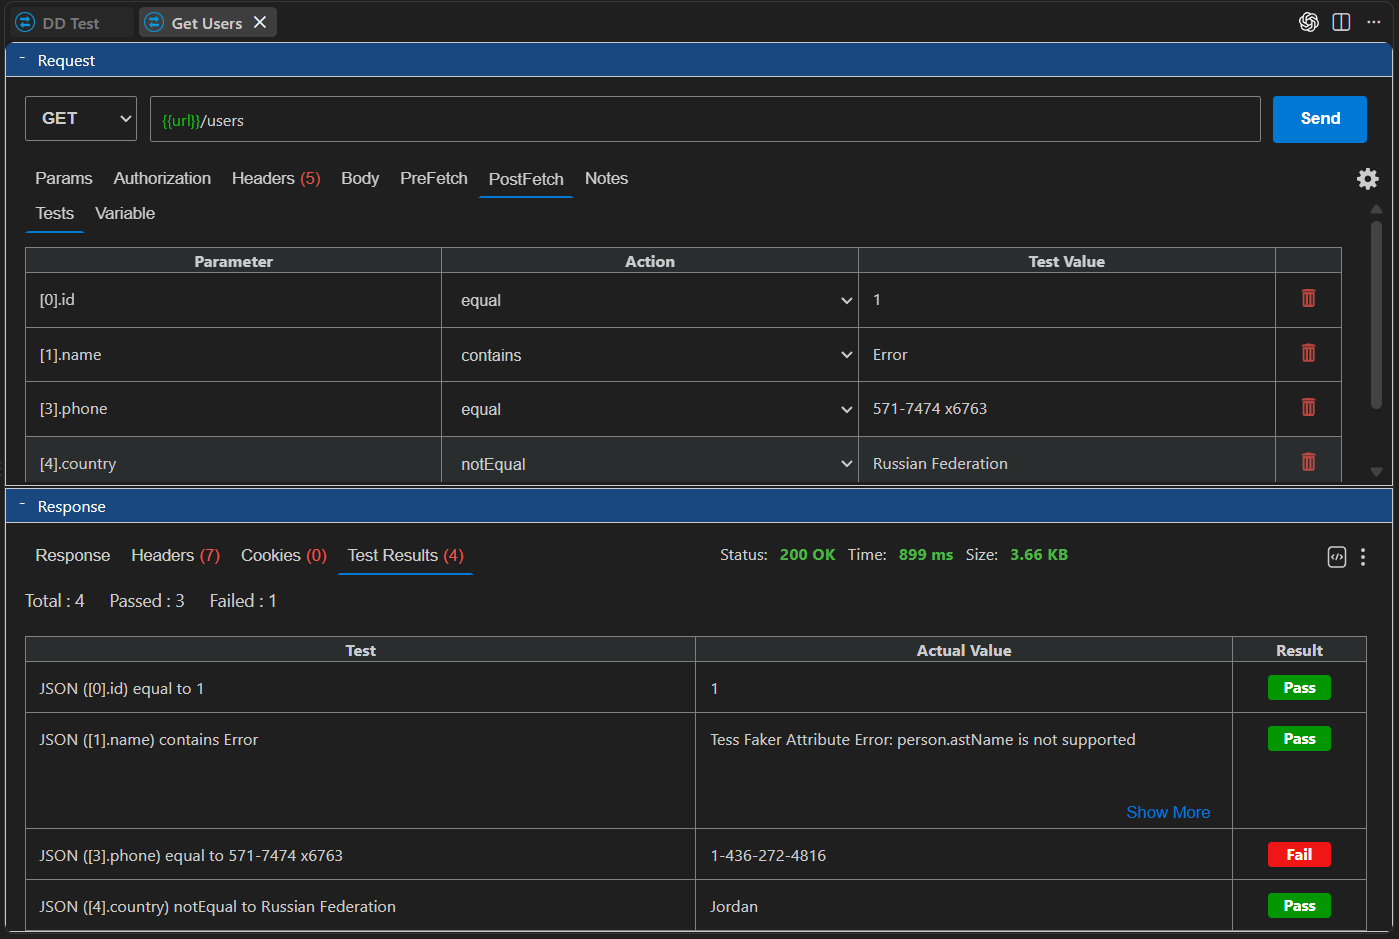
- Clicking a row in the results table opens the corresponding request.
📊 Reading the results
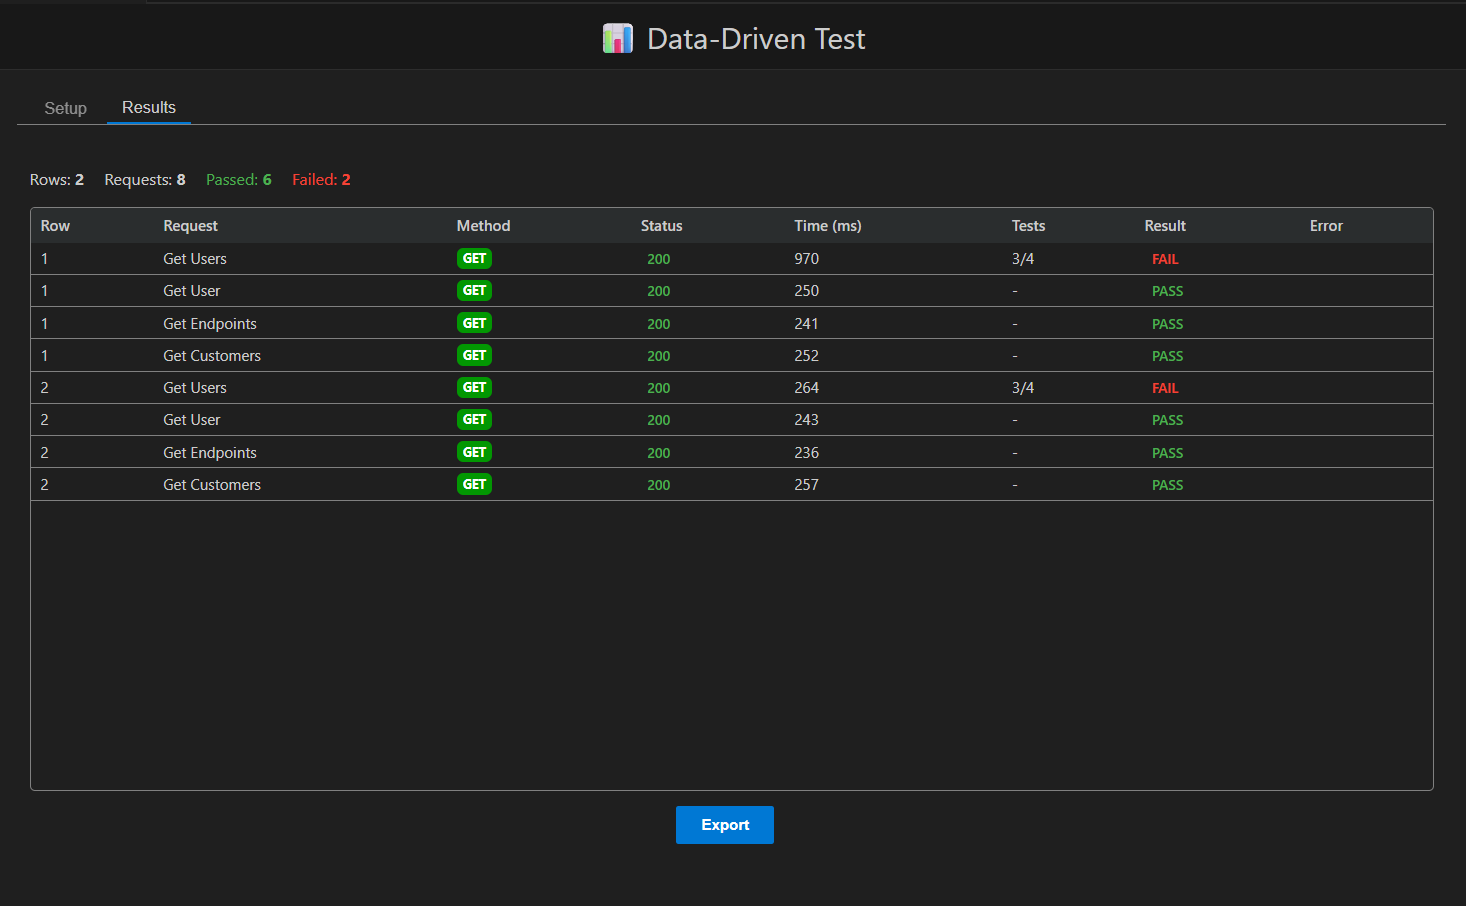
Summary bar
| Item | Meaning |
|---|---|
| Rows | Total number of data rows in this test |
| Requests | Total individual requests sent so far (rows × requests per row) |
| Passed | Requests that returned successfully and passed any test assertions |
| Failed | Requests that errored out or failed their test assertions |
| Cancelled | Shown if you stopped the test early |
Results table
Every request sent is listed with:
- Row - which data row it came from
- Request - the request name
- Method - GET, POST, etc.
- Status - the HTTP status code returned (or "ERR" if the request couldn't connect)
- Time (ms) - how long the request took
- Tests - how many test assertions passed out of the total defined on that request
- Result - an overall PASS/FAIL badge for that request
- Error - any connection or execution error message, if one occurred
📤 Exporting results
Once the test is finished (or cancelled), an Export button appears with several format options:
| Format | Best for |
|---|---|
| JSON | A complete record of the run - your settings, summary numbers, and every row's result. Good for archiving or feeding into other tools. |
| CSV | A simple spreadsheet-friendly summary of every row's outcome. Good for sharing or reviewing in Excel/Sheets. |
| HTML | A shareable, readable report you can open in a browser or send to teammates. |
| XML | A structured export for tools that expect XML. |
| NUnit | A test-report format many CI/CD pipelines and test dashboards can already understand. |
📝 Good to know
- Requests run sequentially, one row at a time - not all at once - so results appear in a predictable order.
- Pre-request steps still run normally during a data-driven test (unlike Performance Testing), since they're often used to set up variables for the row.
- A maximum of 100 rows is supported per data file. If your file has more, you'll be asked to trim it down before running.
- If you change the file format or separator after loading a file, it's automatically re-checked against the new settings - you don't need to re-browse for the file.